Showing posts with label Basics. Show all posts

Tuesday, February 10, 2015

How to: Long Tail Cast On

     The Long Tail Cast On, I would say, is one of the most common cast ons to be used in knitting. It is stretchy, and resembles the Basic Cast On.
     To begin, make your tail roughly a foot long for every twenty stitches you are going to cast on. Once you have done that, make a slip knot on your needle. This counts as the first stitch.


     Now place your tail over your thumb and hold it securely with your ring and pinky fingers. Place the working yarn over your index finger.


     Insert your needle underneath the part of the tail that rests against your palm.


     Now grab your working yarn with the needle and pull it underneath the tail.


     Slide the tail off of your thumb and tighten both the working yarn and the tail.


     You now have two stitches on your needle. Continue casting on until you have the desired amount of stitches on your needle (I did twenty).


Wednesday, June 25, 2014

How to Crochet Backwards

     Crocheting left-handed is really simple! Normally, crocheting is from right to left; when you crochet left-handed, you work from the left to the right. Once you know this, you can make any stitch (or pattern) you would like by simply reversing instructions!

     To create a foundation chain (this is the base of all things crocheted), make a slip knot around your hook and hold your hook in your left hand.


     Wrap your yarn around your hook from the back to the front.


     Pull your yarn through the slip knot. You have now chained one stitch! Keep doing this until you have the amount of stitches desired (I did ten)!


How to Single Crochet Left-Handed

     Chain one stitch to use as a turning chain (you will do this at the beginning of each row). Now, insert your crochet hook into the back loop of the second chain from your hook


     Wrap your yarn from the back to the front of your hook.


     Pull the yarn through one loop.


     Wrap the yarn again, and this time pull the yarn through both of the loops on your hook.


     You have now made one single crochet (abbreviated sc) stitch!


     Continue doing this across the row. When you reach the end of the row, chain one and turn the work. Keep making single crochet stitches with one minor difference; insert your hook underneath both loops of the chain.


     After a few rows, your work should look like this.


Sunday, June 15, 2014

How to Purl Backwards

     Purling backwards (also known as purling left-handed) is easy to learn and probably good to know. However, purling and knitting left-handed does complicate patterns; you'll have to follow instructions for rows backwards.
     To begin, cast on the amount of stitches desired. I did ten. Move the needle to your right hand.


     Pick up your other needle in your left hand. Now insert it behind the front loop and in front of your right-hand needle.


     Move your yarn to the front of your work.


     Wrap the yarn around your left-hand needle from the front to the back.


     Pull the wrapped yarn through the old stitch.


     Finally, pull the old stitch off of the right-hand needle.


     After several rows, your work will look like this.


     This pattern is called the Garter Stitch.

Saturday, May 17, 2014

How to Purl: English Style

     Purling is basically the opposite of the knit stitch. If you've ever made garter stitch, you'll see a few rows of bumps. All of those bumps are the purl side of the work.

     To begin, cast on however many stitches you want. I did ten.


     Now, with your yarn in front, insert your right-hand needle into the middle of the first stitch on your left-hand needle.


     Hold the yarn in your right hand.


     Wrap the yarn counterclockwise around your right-hand needle.


     Pull the yarn through the stitch.


     Pull the stitch off of the left-hand needle.


     Congratulations! You have just learned how to purl English style! To learn how to purl Continental style, go to: At the Back of the Bookshelf: How to Purl: Continental Style.
     If you want, you can keep purling to create the garter stitch, or you can knit one row and purl the next (creating the stockinette stitch).

     The garter stitch...


     The stockinette stitch...

Tuesday, May 13, 2014

How to Knit: English Style

     To begin, cast on as you normally would. For instructions on the basic cast on, and how to knit continental style, go to: At the Back of the Bookshelf: How to Knit: Continental Style


     With your yarn in your right hand, insert your right-hand needle into the front of the first stitch on your left-hand needle.


     Wrap the yarn counterclockwise around your right-hand needle.


     Now pull the stitch off of your left-hand needle.


     Continue knitting across the row. 
     Repeat for several more rows and your work will look like this! This stitch pattern is called the Garter Stitch.


Wednesday, April 16, 2014

How to Decrease: K2tog And P2tog


How to K2tog (Knit Two Together)

     Knit up to the point you wish to decrease. 
     Insert your right-hand needle into the second and first stitch on your left-hand needle as if to knit.


     Wrap the yarn, and knit the two stitches like you would one.


How to P2tog (Purl Two Together)

     Purl up to the point that you wish to decrease. Insert your right-hand needle into the first and second stitch on your left-hand needle as if to purl.


     Wrap the yarn, and purl the two stitches together.


Thursday, March 20, 2014

How to Slip Stitch

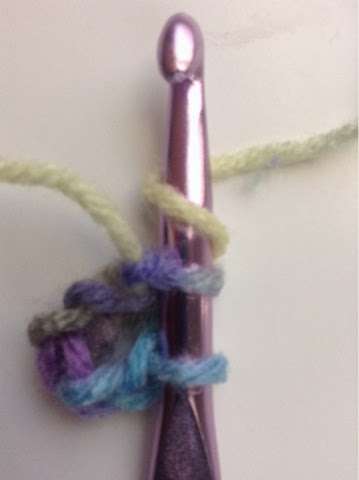
     To make a slip stitch (aka magic loop), chain six.


     Then, insert your crochet hook into the first stitch you chained.


     Yarn over and pull it through both of the loops on your hook.


     You have just made the slip stitch!